[ez-toc]
Macro nature photography is a subset of nature photography and captures pictures of small objects from the natural environment, for instance, insects, tiny plant parts, and flowers. It is a form of photography that captures information which cannot normally be seen with the naked eye because it provides up close magnified view of natural objects and allows the audience to see intricate details of patterns of features of texture and colours.
This technique opens up new ways of seeing the natural world, to skillfully delineate finer surfaces and structures. Newbie macro photographers can have a good start by picking on the simplest of macro lenses or possibly employing extension tubes to closer focus on the subject. How can one enhance his /her macro nature photograph subjects? Yes, Macro nature photography can be fine-tuned by practicing various conditions of subjects and locations with the help of different angles and lighting and practicing different techniques and riggings.
The Ultimate Macro Nature Photography Checklist
One thing I have understood is that good macro nature photographs are not just random captures but should be done in an organized manner. Here’s the ultimate checklist to help you excel in macro nature photography.
Here is the following checklist that can help you achieve great success when practicing macro nature photography:
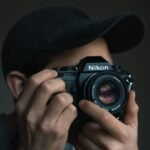
Choose the Right Equipment: To achieve the best results and to gain the right focus possible, as recommended shots must be shot with a different macro lens or extension tubes.
Understand Your Subject: Hence, to be able to guess what position of your subject would be interesting to photograph next time, one should know the typical behaviour and the environment of a subject.
Lighting Techniques: While taking the jewelry photos there should not be a direct light source used in order to minimize on shadows that may hide some of the minute details in the jewelry, instead natural light or ring flash should be used.
Steady Your Camera: This should never rely on the image stabilization function of the camera but should always use a tripod as this eliminates any form of movement capable of causing blurry subject matter.
Focus on Composition: They should keep the position of the subject, the area around them, and their view of the scene brilliantly illuminated and sharply framed with a view of the boisterous background.
Practice Patience: Macrophotography sometimes results in a static object or at the very least, an object that should not be moving or will not move much during the process of taking a photograph.
Experiment with Angles: Also, to be on the safe side, try to capture the best snapshot possible, and search for the ideal position that will flare your subject’s features.
Master Focus Techniques: If this fails, consider the use of a manual or focus stacking where the sections, should be in focus.
Mind the Background: Ensure that the background of an image does not call emphasis on a particular area thus turning it into a subject for the picture and overcrowding the focal part of the picture.
According to the checklist, one will also be able to sharpen their focus on areas of interest to capture beautiful macro environments of nature and the miniature world.
Art of Macro Nature Photography: Inspiration and Physical Implementations
Nature photography is one of the most inspiring and captivating forms of photography, where the photographer has a great opportunity not only to watch but also to record the existence of breathtaking phenomena in the world of nature that the human eye would not be able to notice. Below are some techniques and sources of inspiration to consider when it comes to macro nature photography.
Here are some crucial tips and inspiration sources for macro nature photography
Use the Right Equipment: A macro lens having a focal length equivalent to a life-size being 1:1 is an appropriate lens to use to capture detail. Other accessories such as extension tubes and close-up filters are also useful in producing macro effects, but would not require a specific macro lens.
- Manual Focus: Press the AF mode switch to change to manual focus to have the ability to adjust the position of the focus point. This is beneficial where a small area is in focus and other areas are out of focus especially where working at the macro level.
- Lighting: Whenever one can, light should be natural but in instances where it cannot be relied on the use of a ring flash or other external sources of light should be incorporated to ensure the required evenness is achieved to prevent shadowing.
- Stability: To prevent any shaking during the shot, including the movement of your camera, use a tripod especially when at higher magnifications.
- Background and Composition: Curtailing distractions: It is advisable to focus on the background of the model since it might be a possible distraction Use artistic angles such as the rule of thirds among others.
- Patience and Observation: Basically, the less invasive the camera is, the more successful the candid photography will be; observing and studying your subjects can allow you to guess when they will be in an interesting pose or configuration.
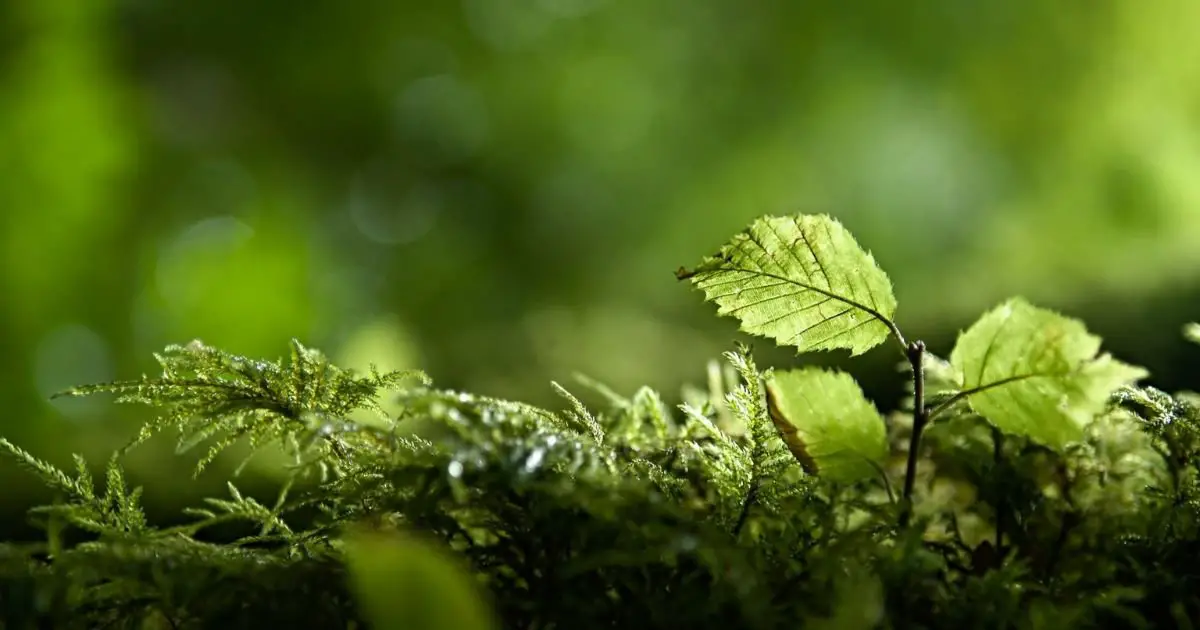
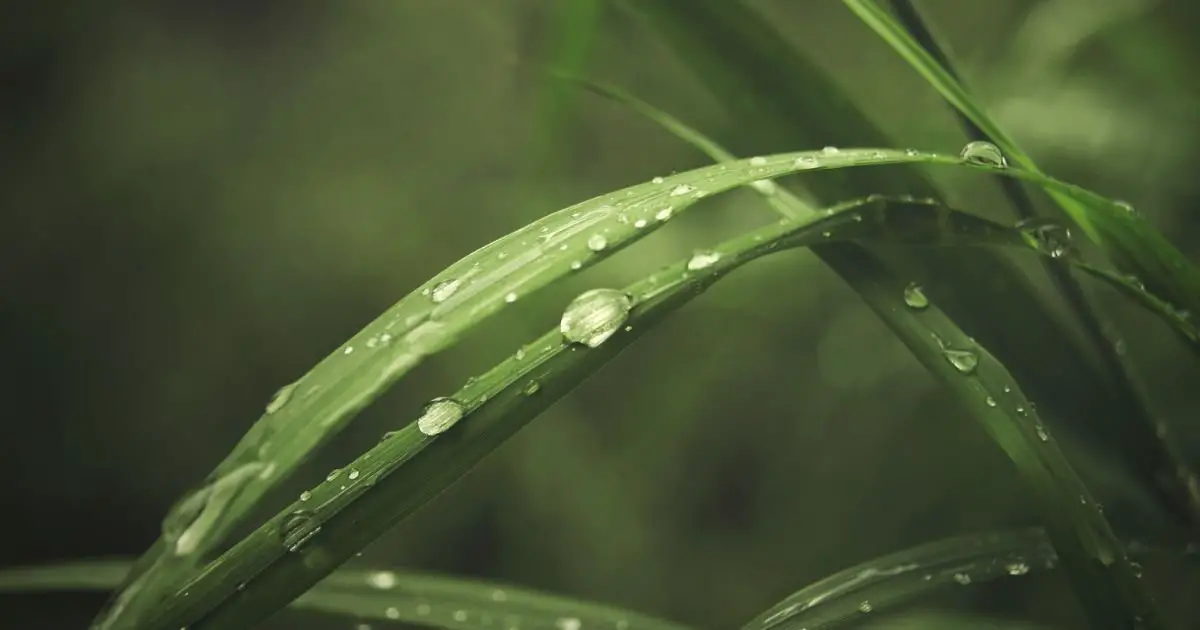
- Creative Ideas: Try out multiple viewpoints and fields. For instance, it is possible to concentrate on the formed reflections of water droplets on the leaves, the relief of the tree’s bark, or the patterns of the wings of insects.
- Ethical Considerations: Always avoid getting the wrong image at the expense, of comfort or risking the lives of the animals in their natural environment. Don’t take the risk of disturbing or offending the views of nature or any of its inhabitants.
Step-by-Step Guide to Captivating Macro Nature Photography
Macro nature photography deserves to be appreciated, as it gives an exciting opportunity to explore the world that lies in the human eyesight. Follow this step-by-step guide to create captivating macro images. Follow this step-by-step guide to create captivating macro images
Choose the Right Gear
Camera: In a nutshell, any DSLR or mirrorless camera should suffice even without having the ability to autofocus on the object of interest.
Lens: Therefore, it is advisable that if the object measuring one unit is to be captured, the size of the image captured should be one unit in size and therefore the size of the camera used should be other gear can be valuable if used for macro photography which include extension tubes and close up filters.
Set Up Your Camera
Manual Mode: Go to the menu and select M for the mode to do away with the automatic options of exposure, aperture and ISO.
Aperture: Posing and subject stabilization If you must shoot at distances larger than the mega pixel’s advertised focal length, it is safer to use a small aperture, preferably between f/8 to f/16, to maintain subject focus.
ISO: Select limited motion (e. g. low – 100 – 400) for low noise, particularly when shooting intricate scenes.
Focus Manually
A large bokeh can be obtained by using manual focus in order to make sure which part of the subject will be in focus. Focusing at such close range can also be a bit challenging, especially with an attached autofocus system on the camera.
Stabilize Your Camera
Tripod: It is also essential when in high magnification, where camera shake is highly undesirable; and for this, a tripod must be used.
Remote Shutter Release: It helps to use a remote or the camera’s timer, which will minimize the vibrations on the moment of the shot.
Control Lighting
Natural Light: opt for late in the morning and early in the afternoon to get softer light.
Artificial Light: It will help to avoid opaque shadows and prominent highlights on the figures and accessories, it is better to use diffusers or reflectors. A ring flash can also offer evenly light around a subject since the whole of the ring diffuses the light.
Compose Your Shot
Background: Aim at having a clear background with minimal distracting elements or props to be captured.
Perspective: Look for the most compelling shooting angle that will be different from the traditional way of shooting a subject.
Shoot in Burst Mode
Burst mode helps you take sequential shots rapidly. This helps to reduce blurring of your subject if it is in motion, thereby increasing your likelihood of capturing a quality photograph.
Post-Processing
Sharpening: Use the Sharpen option with a very low value just enough to sharpen up the image.
Contrast and Color: Further enhance contrast and colour inset your subject to make it stand out, while still looking authentic.
Ethical Considerations: Try not to cause any further disruption, particularly to the existing ecosystem or rare wildlife, first have a look and take footage if you can. Always avoid disturbing the animals and the vegetation that are present around you when taking photographs.
This way, you are well-equipped to capture some of the most remarkable macros introducing the viewers to the wonders of nature up close.
Essential Tips for Macro Nature Photography
Macro nature photography also enables an individual to capture small aspects of the natural environment such as insects, flowers, and surfaces. Here are some essential tips to help you excel in this field. Here are some essential tips to help you excel in this field:
- It is recommended that magnification ratios ought to be 1 to get the most favourable outcomes. Extension tubes also assist in achieving close focusing distances on this type of lens and not just macro-ones.
- Tap the twentieth icon on the right side to change the focusing mode to manual to determine the portion of the subject that should be in focus. This is particularly important when shooting small objects to capture the details that might not be easily visible otherwise.
- when taking the shots to minimize the effect of camera movement, which is more apparent when using high magnification settings. It is also advantageous to use remote shutter release in order to avoid physical vibrations.
- Choose the dusk or dawn time to take photographs to minimize extreme contrast and harsh light conditions. The best days to shoot are the overcast days as it light can be used as a source of light without the problem of casting shadows.
- Smaller aperture (for instance f/8 to f/16) should be more effective in widening the area of field of depth so that more of the subject can be captured in sharp focus. It can be adjusted in terms of the kind of impact that one wants to have as a result of taking an action.
- For insects and animals, pay attention on the eyes as it provides an additional layer to make the image interesting. The excellent observation is crucial for the macro portrait since it needs to be expressive.
- I think that when the background is neat and uncluttered, the stress is taken off of the subject. This is when the aperture or f-stop is adjusted to make the back as blurry as possible to give the focus on the subject.
- If a particular angle works for a competitor, it is a good idea to try and turn it the other way around. Take photographs from various angles because the positioning can provide new angles that are engaging to the observer.
- I noticed that wind at close to 30 mph can cause blur particularly to subjects that are small in size. This will make sure that the subject does not move and blur the photograph because of the wind or the camera shakes from the wind.
- Focus on the effect of a higher level of sharpness and contrast when post-processing your images. This makes the details to come out more clearly as well as making the images that are being produced to be more outstanding.
Implementing these suggestions will increase the utility and the significance of your macro nature photographs and highlight the beauty of the world surrounding us.
FAQS
Who is the best macro photographer?
Levon Biss is widely considered one of the best macro photographers for his intricate and detailed work in the field.
What are the best nature photography techniques?
Use natural light, focus on composition, shoot during golden hours, and maintain a steady camera with a tripod for the best nature photography.
How can I improve my nature photography skills?
To improve your nature photography skills, practice regularly, experiment with different angles and lighting, and study professional photographers’ techniques for composition and camera settings.
Which camera settings are ideal for macro nature photography?
Macro nature photography, uses a low ISO, a small aperture (f/8-f/16) for depth of field, and a fast shutter speed to reduce blur.
What equipment do I need for successful macro nature photography?
The successful macro nature photography, you’ll need a dedicated macro lens (or extension tubes), a tripod, and good lighting.
Conclusion:
In Conclusion, macro nature photography gives the starters a thrilling exploration of the detailed world of spiders, bees, butterflies and blossoms rocks and metals. The art of macro photography though simply needs to be learned and mastered and this involves knowing the various basic features including the kind of equipment to use like macro lenses or extension tubes to get closer. It contains some advanced features such as the manual focus with the ability to zoom to work on details. Knowing when to use windows as a light source and when not to, understanding how to manage and get the most out of daylight and utilizing focus as the final component are important principles.
The following areas of concern should also be of particular concern to beginners. They should ensure that they select pure backdrops that will complement their subjects. Macro nature Photography needs constant training to become competent enough to provide eye-catching and artistic images of natural objects.